Audio-Technica AT-LP120USB Manual: A Comprehensive Guide
This manual provides detailed instructions for the Audio-Technica AT-LP120USB turntable, enabling users to fully utilize its features for both analog playback and digital vinyl preservation.
It covers setup, connection to computers, software installation, operation, maintenance, and troubleshooting, ensuring a seamless experience for vinyl enthusiasts.
The guide aims to help users digitize their record collections with optimal audio quality, while also maximizing the enjoyment of traditional vinyl listening.
The Audio-Technica AT-LP120USB is a highly regarded, fully manual, professional turntable designed for those passionate about vinyl and seeking a pathway to digitize their cherished record collections. It bridges the gap between traditional analog listening and modern digital convenience, offering a robust feature set at an accessible price point.
This turntable isn’t just for playback; it’s a complete solution. It allows users to connect directly to computers via USB, facilitating easy recording and preservation of vinyl audio. Its popularity stems from its blend of performance, versatility, and value, making it a common sight in record stores and home audio setups alike.
The AT-LP120USB builds upon the foundation of the AT-LP120 DJ turntable, incorporating enhancements for audiophiles. It’s designed to deliver a warm, intimate sound experience while providing the tools necessary to safeguard your vinyl investment in a digital format. This manual will guide you through every aspect of its operation.
What’s in the Box: Components and Accessories
Upon opening your Audio-Technica AT-LP120USB package, you’ll find a comprehensive set of components designed to get you started with your vinyl journey. The core of the package is, of course, the AT-LP120USB turntable itself, featuring a direct-drive motor and adjustable tonearm.
Included alongside the turntable is a detachable RCA output cable for connecting to your amplifier or receiver, allowing for traditional analog playback. A 45 RPM adapter is also provided, enabling you to enjoy your 7-inch singles. Crucially, the package contains a USB cable for direct connection to your computer.
Furthermore, you’ll receive a software download coupon granting access to Audacity or similar audio recording software, essential for digitizing your vinyl. Finally, the box includes this comprehensive instruction manual, guiding you through setup, operation, and maintenance of your new turntable.
Setting Up Your Turntable: Initial Assembly
Begin by carefully unpacking all components and placing the AT-LP120USB on a stable, level surface, minimizing vibrations for optimal sound quality. Next, connect the RCA output cable to the turntable’s rear panel and your amplifier or receiver. Ensure a secure connection for clear audio transmission.
Attach the 45 RPM adapter to the spindle if you plan on playing 7-inch records. Gently place the platter onto the turntable’s spindle, ensuring it sits securely. Connect the anti-skate knob and tonearm rest – these are usually pre-attached but verify their stability.
Before powering on, inspect the cartridge and stylus for any shipping damage. The AT-LP120USB typically arrives with these pre-installed, but careful observation is crucial. Finally, position the dust cover, protecting your turntable from dust and scratches when not in use.
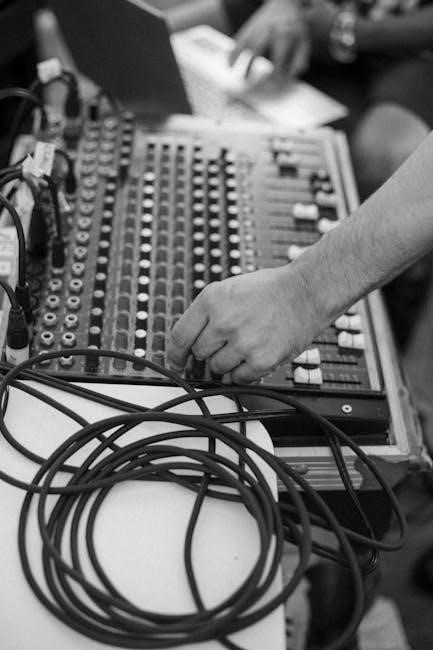
Connecting to Your Computer via USB
To digitize your vinyl, connect the included USB cable from the AT-LP120USB’s rear panel to an available USB port on your computer. The turntable will be recognized as an audio input device, though initial driver installation might be necessary depending on your operating system.
Ensure the turntable is powered off during the connection process to prevent potential issues. Once connected, your computer should detect the AT-LP120USB as a sound card. You may need to select it as the default input device within your computer’s sound settings.
For optimal performance, use a high-quality USB cable and avoid connecting through USB hubs if possible. Direct connection to your computer ensures a stable and reliable audio transfer for digitizing your vinyl collection.
Software Installation: Audacity and Other Options
For recording vinyl to your computer, software is essential. Audacity, a free and open-source audio editor, is a popular choice and is readily available for Windows, macOS, and Linux. Download and install Audacity from its official website, ensuring you select the correct version for your operating system.
Alternatively, other recording software options include Adobe Audition, WavePad, and GarageBand (for macOS users); These programs often offer more advanced editing features but may require a purchase.
After installation, configure your chosen software to recognize the AT-LP120USB as the audio input device. Consult the software’s documentation for specific instructions on setting up recording parameters and selecting the appropriate input source.
Understanding the Turntable Controls

The AT-LP120USB features a range of controls for optimal operation. Familiarizing yourself with these is crucial for enjoying your vinyl collection; The Power Switch, located on the base, initiates operation. Speed Selection allows choosing between 33 ⅓, 45, and 78 RPM, accommodating various record sizes.
The Tonearm Lift smoothly raises and lowers the tonearm, preventing damage to the stylus and record. The Cueing Lever provides precise control for track selection. Anti-Skate Control minimizes distortion by counteracting the inward pull of the tonearm.
These controls work in harmony to deliver a high-fidelity listening experience. Understanding their functions ensures proper playback and longevity of your vinyl records.
Power Switch and Speed Selection
The AT-LP120USB’s Power Switch, conveniently located on the turntable’s base, initiates and terminates operation. Ensure the switch is in the ‘ON’ position for playback. Speed Selection is vital for accurate record reproduction, controlled by a selector switch near the platter.
Three speeds are available: 33 ⅓ RPM for LPs and some 12-inch singles, 45 RPM for singles and some EPs, and 78 RPM for older shellac records. Correct speed selection is paramount to avoid pitch distortion and preserve the artist’s intended sound.
Always verify the correct speed before dropping the needle. Incorrect speed settings can damage both the record and the stylus. Proper use of these controls ensures optimal listening enjoyment.
Tonearm Lift and Cueing Lever
The Tonearm Lift and Cueing Lever is a crucial component for gentle record handling and precise playback control. Located near the tonearm rest, this lever allows you to raise and lower the tonearm smoothly, preventing accidental stylus damage and record wear.
To raise the tonearm, lift the lever fully. This disengages the anti-skate mechanism and allows for safe movement across the record surface. To lower the tonearm, slowly and deliberately return the lever to its original position, gently cueing the stylus onto the vinyl.
Practice using the cueing lever to find the desired starting point on the record. Avoid dropping the tonearm, as this can cause significant damage. Mastering this lever ensures a refined listening experience.
Anti-Skate Control Adjustment
The Anti-Skate Control is vital for maintaining balanced tonearm movement and preventing distortion. As the stylus tracks the record groove, it experiences an inward pull. Anti-skate compensates for this force, ensuring equal pressure on both stereo channels.

Located on the base of the turntable, the anti-skate dial is numbered to correspond with the tracking force setting. Start with the anti-skate setting matching your tracking force (e.g., if tracking force is 2.0g, set anti-skate to 2.0).
Fine-tune the adjustment by listening for channel imbalance or distortion. Increase anti-skate if the left channel sounds louder, and decrease it if the right channel is dominant. Proper adjustment minimizes wear and maximizes sound quality.
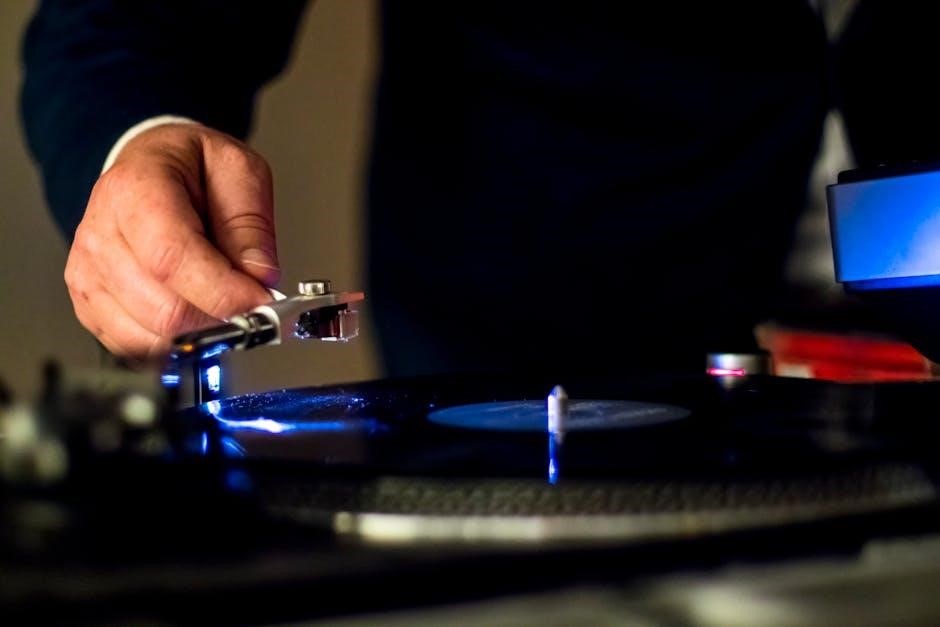
Cartridge and Stylus Overview
The AT-LP120USB features a pre-mounted cartridge and stylus, designed for optimal performance right out of the box. The cartridge houses the stylus, the tiny component that physically reads the grooves of your vinyl records. Understanding these components is key to proper maintenance and sound quality.
The included stylus is a replaceable diamond tip, responsible for accurately tracing the record’s undulations. Regular inspection of the stylus is crucial; debris or wear can significantly impact audio fidelity. The cartridge’s wiring connects to the tonearm, transmitting the signal to your amplifier.
Proper alignment and tracking force (discussed elsewhere in this manual) are essential for maximizing the lifespan of both the stylus and your vinyl collection.
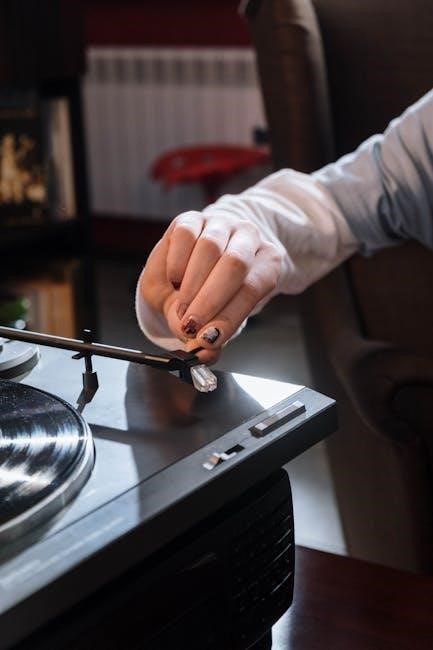
Replacing the Stylus: A Step-by-Step Guide
Replacing the stylus is a straightforward process, extending the life of your cartridge and maintaining optimal sound quality. First, disconnect the turntable from power. Gently lower the tonearm lift to raise the tonearm. Using a small, flathead screwdriver, carefully remove the stylus guard.
Gently pull the old stylus straight down – avoid twisting or applying excessive force. Align the new stylus with the cartridge slot and carefully push it in until it clicks. Ensure it’s securely seated. Replace the stylus guard.
Lower the tonearm lift and visually inspect the stylus to confirm proper installation. Always handle the stylus with care to avoid damage. Regular stylus replacement (typically every 1000 hours) is vital for preserving both your records and audio quality.
Cartridge Alignment: Ensuring Optimal Sound
Proper cartridge alignment is crucial for accurate tracking and minimizing distortion. Begin by loosening the cartridge mounting screws slightly. Utilize a cartridge alignment protractor – downloadable online or purchased separately – to guide the process. Align the cartridge body with the grid lines on the protractor, ensuring both null points are as close to zero as possible.
Adjust the cartridge’s position by gently moving it forward, backward, and rotating it within the headshell. Tighten the mounting screws incrementally, rechecking alignment after each adjustment. Accurate overhang and azimuth are key.
Precise alignment minimizes record wear and maximizes sonic performance. If unsure, consult a professional for assistance. A misaligned cartridge can lead to reduced sound quality and potential damage to your vinyl collection.
Digitizing Vinyl Records: A Detailed Process
Digitizing your vinyl collection with the AT-LP120USB is straightforward. First, connect the turntable to your computer via USB. Ensure the turntable is selected as the audio input device in your recording software (Audacity is recommended). Set the recording level to avoid clipping – aim for peaks around -6dB.

Begin playback and start recording in your software. Monitor the audio levels throughout the recording. Once the side is complete, stop the recording and save the file in a suitable format (WAV or FLAC are preferred for archival quality).
Edit the recording to remove any unwanted noise or clicks. Finally, convert the file to your desired format (MP3) for portable playback.
Audio Recording Settings for Best Quality
To achieve the highest quality digital recordings from your vinyl, prioritize these settings. Within your recording software, select a sample rate of 96kHz or 192kHz for maximum detail. A bit depth of 24-bit is also recommended, providing a wider dynamic range than 16-bit.
When setting input levels, avoid clipping at all costs. Aim for peak levels around -6dBFS. Monitoring the audio during recording is crucial. Utilize noise reduction tools sparingly, as excessive processing can degrade sound quality.
Save your initial recordings in a lossless format like WAV or FLAC. This preserves all the audio information captured from your vinyl. Later, you can convert to MP3 for convenience, but always from the lossless master file.
Troubleshooting Common USB Connection Issues
If your AT-LP120USB isn’t recognized by your computer, first ensure the USB cable is securely connected to both the turntable and a USB 2.0 port (avoid USB 3.0 initially). Try a different USB cable and port to rule out hardware issues.
Check your computer’s device manager for any unrecognized devices or driver errors. Reinstalling the Audio-Technica USB driver often resolves these problems. Ensure your operating system is up-to-date with the latest patches.
Some computers may require you to select the AT-LP120USB as the default audio input device. Also, verify that the turntable is powered on before connecting the USB cable. Restarting both the turntable and computer can sometimes clear connection conflicts.
Adjusting the Tracking Force

Proper tracking force is crucial for optimal sound and vinyl preservation. The AT-LP120USB features adjustable counterweight allowing precise control. Begin by unlocking the counterweight and rotating it until the tonearm floats horizontally, balanced.
Next, use the calibrated dial on the counterweight to set the recommended tracking force for your cartridge (typically between 2.0 and 4.0 grams – consult your cartridge specifications). Zero the tracking force dial before applying the correct weight.
Ensure accurate adjustment using a stylus force gauge for verification. Incorrect tracking force can lead to distorted sound, record wear, or even damage to the stylus. Regularly check and readjust as needed.
Balancing the Tonearm
Achieving proper tonearm balance is the first step in optimizing your AT-LP120USB’s performance. Begin by removing the stylus guard and unlocking the counterweight at the rear of the tonearm. Gently lift the tonearm and rotate the counterweight until the arm floats horizontally, perfectly balanced.
This “zero balance” position eliminates friction, allowing the stylus to move freely in the groove. Fine-tune the balance by slowly adjusting the counterweight until the tonearm remains level when released.
Once balanced, lock the counterweight in place. This ensures accurate tracking force adjustment and minimizes wear on your vinyl records. Proper balancing is fundamental for optimal sound quality and stylus longevity.
Understanding Vertical Tracking Angle (VTA)
Vertical Tracking Angle (VTA) refers to the angle of the stylus relative to the record surface. Ideally, the tonearm should be parallel to the record surface when playing. The AT-LP120USB allows for VTA adjustment via the tonearm height.
Incorrect VTA can lead to distorted sound, reduced detail, and increased record wear. If the tonearm is too high, the sound may be thin and lack bass; if too low, it can sound muffled and distorted.
Adjusting VTA involves raising or lowering the tonearm base. Listen carefully for improvements in soundstage, clarity, and overall tonal balance while making small adjustments. Achieving optimal VTA is a subtle process, but crucial for maximizing your listening experience.
Cleaning and Maintenance
Regular cleaning is vital for maintaining the performance and longevity of your AT-LP120USB. Dust accumulation can negatively impact sound quality and component lifespan. Use a carbon fiber brush before each play to remove dust from the record surface.
Periodically clean the stylus with a stylus brush, gently brushing from back to front. Avoid excessive pressure or harsh cleaning fluids. The platter and base can be wiped down with a soft, damp cloth.
Avoid spraying liquids directly onto the turntable. Inspect the belt periodically for wear and replace it as needed. Proper maintenance ensures optimal performance and protects your investment in analog audio.
Dust Cover Care
The dust cover protects your AT-LP120USB from dust and debris, preserving both its appearance and the vinyl records. When cleaning, use a soft, lint-free cloth and a mild plastic polish specifically designed for acrylic surfaces.
Avoid abrasive cleaners or solvents, as these can scratch or damage the cover. Gently wipe in circular motions to remove fingerprints and dust. Handle the dust cover with care to prevent accidental breakage.
When opening or closing the cover, ensure there are no obstructions. Proper care of the dust cover will maintain its clarity and protective function, extending the life of your turntable and records.
Belt Replacement Procedure
Over time, the drive belt on your AT-LP120USB may stretch or wear out, affecting speed accuracy. Replacing it restores optimal performance. First, disconnect the turntable from power. Carefully remove the platter, then gently lift the old belt from the motor pulley and the inner groove of the platter.
Install the new belt, ensuring it’s seated correctly on both the pulley and platter. Reinstall the platter and verify the belt remains in place. Connect the power and test the turntable at various speeds to confirm proper operation.
Regular belt replacement – typically every few years – is crucial for maintaining consistent playback speed and preventing motor strain. A new belt ensures a smooth and accurate listening experience.
Common Problems and Solutions
Experiencing issues with your AT-LP120USB? A frequent problem is speed inaccuracy; check the belt for wear and ensure proper seating. Motor noise can often be resolved by cleaning the motor pulley and surrounding area. USB connectivity issues may stem from driver conflicts – reinstalling or updating drivers is recommended.
If the tonearm isn’t tracking correctly, verify the anti-skate and tracking force settings. Distorted audio could indicate a worn stylus, requiring replacement. Always disconnect power before attempting any internal adjustments.
Consult the Audio-Technica support website for detailed troubleshooting guides and FAQs. Proper maintenance and careful attention to these common issues will keep your turntable performing optimally.
Motor Noise Troubleshooting
Unusual motor noise from your AT-LP120USB can indicate several issues. First, ensure the platter is clean and spins freely; obstructions can cause friction and noise. Inspect the motor pulley for dust or debris accumulation – gentle cleaning with a soft cloth is advised.
Check the belt’s condition; a worn or stretched belt can contribute to motor strain and noise. Verify the turntable is on a level surface to prevent uneven stress on the motor. If the noise persists, it might indicate a motor bearing issue, potentially requiring professional servicing.
Avoid applying excessive force when cleaning or inspecting the motor components. Refer to the official Audio-Technica documentation for detailed diagrams and safety precautions.

Speed Accuracy Calibration
Maintaining accurate speed is crucial for optimal vinyl playback on your AT-LP120USB. While generally factory-calibrated, slight variations can occur. Use a strobe disc and a fluorescent light to visually check platter speed against the 33 ⅓ and 45 RPM markings.
The pitch control knob allows for fine-tuning. Adjust it incrementally while observing the strobe effect; a stationary pattern indicates accurate speed. Avoid extreme pitch adjustments as they can degrade sound quality. If significant calibration is needed, it may suggest a motor or belt issue requiring attention.
Regularly verify speed accuracy, especially after belt replacements or if you notice pitch instability during playback. Consult online resources for detailed calibration guides and visual aids.
Specifications of the AT-LP120USB
The Audio-Technica AT-LP120USB is a direct-drive turntable featuring a high-quality AT95E cartridge. Its motor provides stable rotation at 33⅓, 45, and 78 RPM, with adjustable tracking force and anti-skate control. The signal-to-noise ratio is typically 60dB or better, ensuring clear audio reproduction.
USB connectivity allows for direct digital recording to computers, with a 48kHz/16-bit resolution. The turntable supports both MM (Moving Magnet) cartridges and includes a built-in phono preamp for connection to standard audio inputs. Dimensions are approximately 16.34 x 13.58 x 6.3 inches, and it weighs around 8.64 pounds.
Power requirements are 100-240V, 50/60Hz, making it suitable for global use. Wow and flutter are rated at 0.2% WRMS, indicating minimal speed fluctuations.
Warranty Information and Support
Audio-Technica provides a one-year limited warranty against defects in materials and workmanship from the date of purchase for the AT-LP120USB. This warranty covers manufacturing flaws and does not extend to damage caused by misuse, accidents, or unauthorized modifications.
To initiate a warranty claim, retain your proof of purchase and contact Audio-Technica’s customer support. They offer support via phone, email, and their website, providing troubleshooting assistance and repair services. Extended warranties may be available through authorized retailers.
For additional support, consult the comprehensive FAQ section on the Audio-Technica website or explore online forums dedicated to vinyl enthusiasts. Authorized service centers are also available for repairs outside the warranty period. Registering your product online can streamline the support process.
Resources and Further Reading
Expand your knowledge of vinyl and the AT-LP120USB with these helpful resources. Audio-Technica’s official website offers detailed product information, FAQs, and downloadable resources. Online vinyl communities and forums, like Steve’s Vinyl Records and Reddit’s r/vinyl, provide valuable user experiences and troubleshooting tips.
Explore articles and reviews on websites such as What Hi-Fi? and Sound & Vision for in-depth analyses of the turntable’s performance. YouTube channels dedicated to audio, like Andrew Tarkington, offer tutorials on setup, maintenance, and sound optimization.
Consider books on vinyl collecting and audio engineering to deepen your understanding. Websites specializing in record care, such as Vinyl Styl, provide guidance on cleaning and preserving your vinyl collection. These resources will enhance your enjoyment and expertise.